


Table of contents
Short Story, Simple Story
Okay, I am going to tell you a short story about someone who is willing to go to Bali (Indonesia) but is restricted because of some authentication dispute. I am just kidding, let's get back down to business where I will be taking you on a ride on how to authenticate users using Passport.js in an express server. By the way, did you know Bali has Visa on Arrival facility? I didn't know this. 👀
Passport.js is the middleware used for authenticating any user for Express-based web applications (Node.js). There are various magic tricks provided by passport.js by which users can be authenticated based on a username & password or using Facebook or Google etc. and the name of these magic tricks are called Strategies like passport-local or passport-facebook etc. In this part, we will be focussing on the local strategy, i.e., using username & password.
Let's get started. First, I will be sketching out the prerequisites for this authentication project.
Prerequisites
- Node.js (I am assuming, you have basic knowledge about building an express server).
- EJS - To create an HTML template with minimal code.
- Express Session - A server-side framework to create & manage session middleware.
and that's it.
Note: Whatever the code snippets I will be sharing, I am assuming you will follow it into your IDE for the best practice. Make sure, you read the comments in the snippets. 😉
Step 0: Install the dependencies by running the following commands.
npm init -y
npm install express express-session ejs express-ejs-layouts express-flash passport passport-local
bcryptjs nodemon
Please use sudo if you are facing any issues.
Step 1: Set up a simple express server along with the EJS as a view engine and the express session.
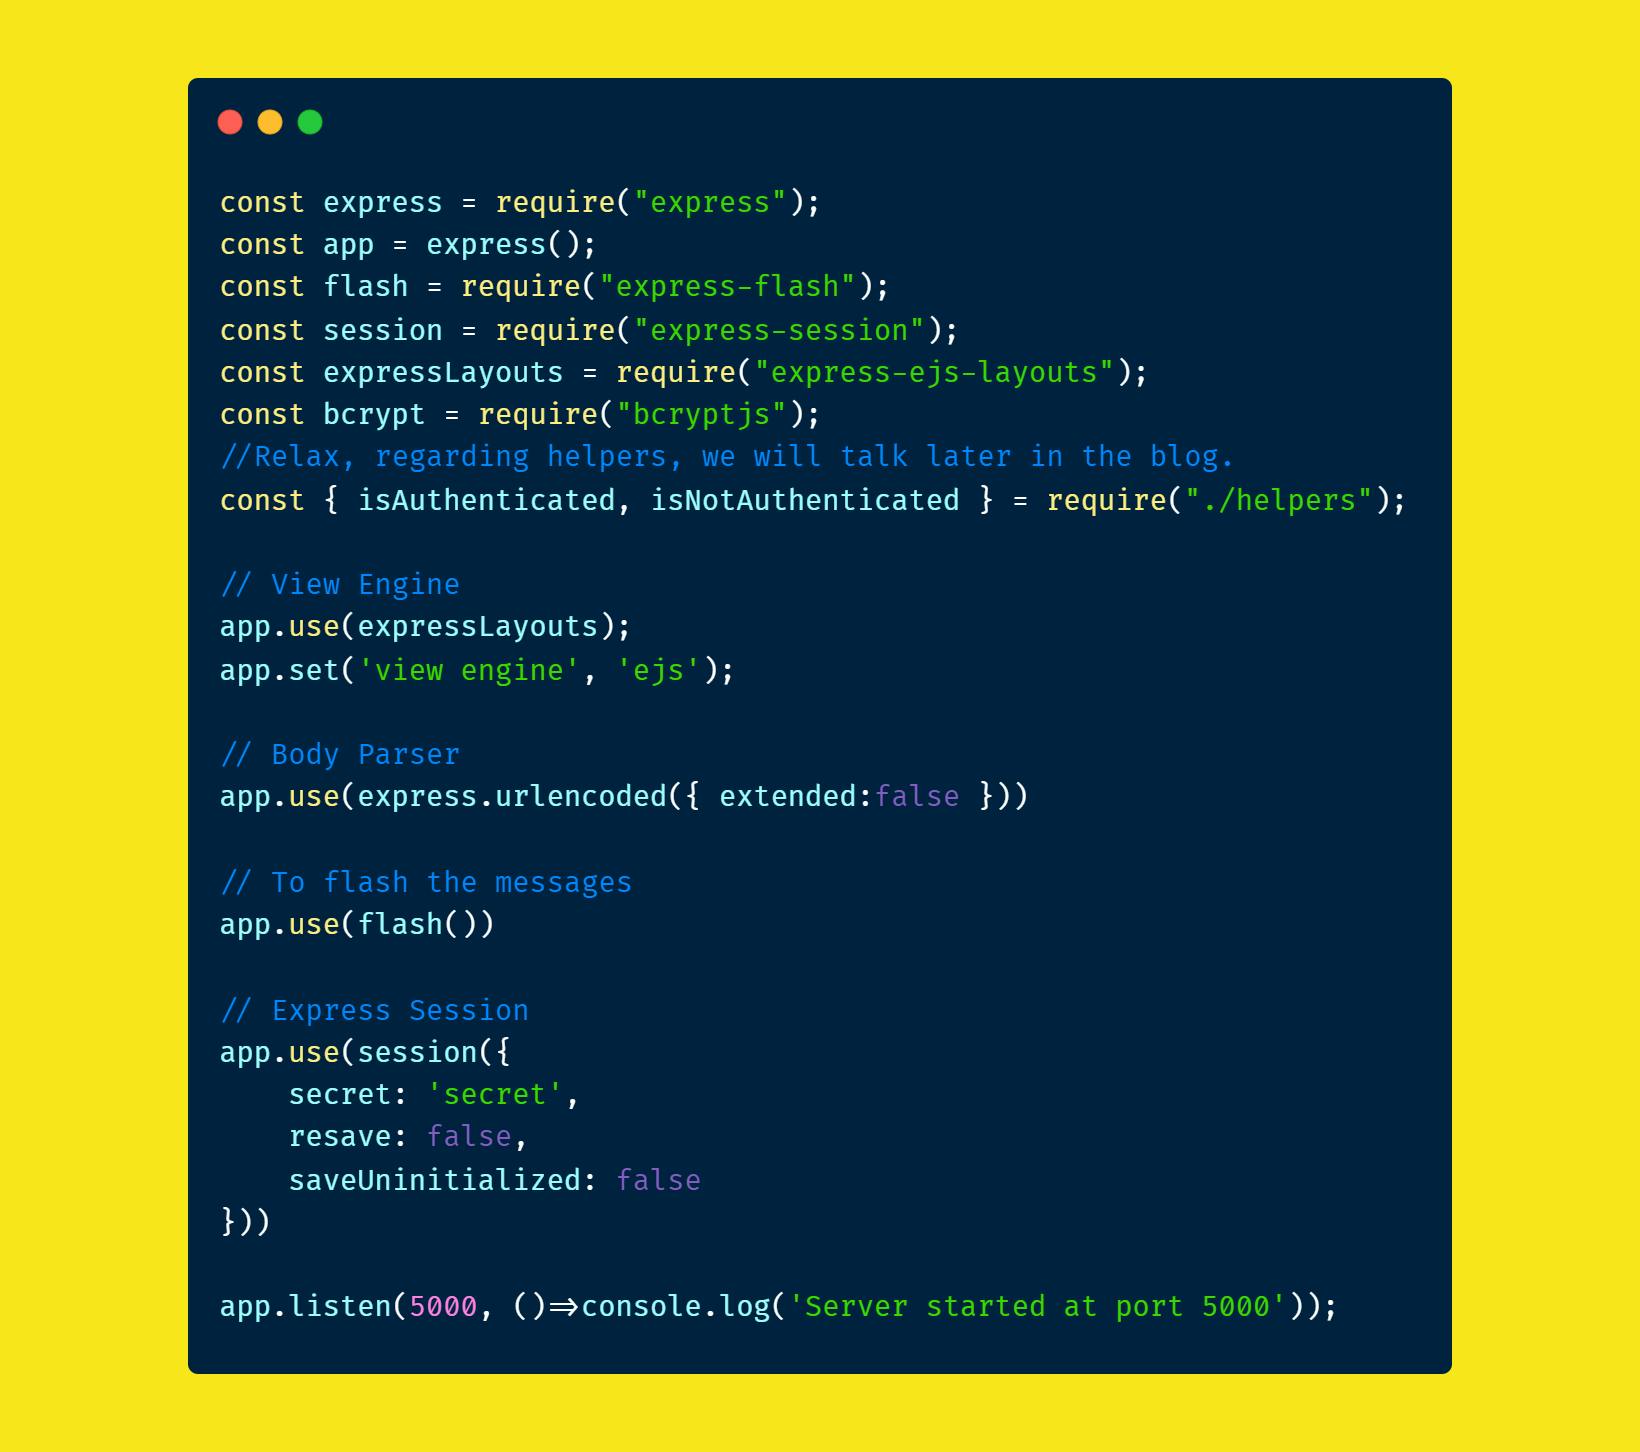
Relax, regarding helpers, we will talk later in the blog.
Step 2: Now, it is time for the routes that render the pages from the views folder. I will share the link for the repository at the end of this blog.
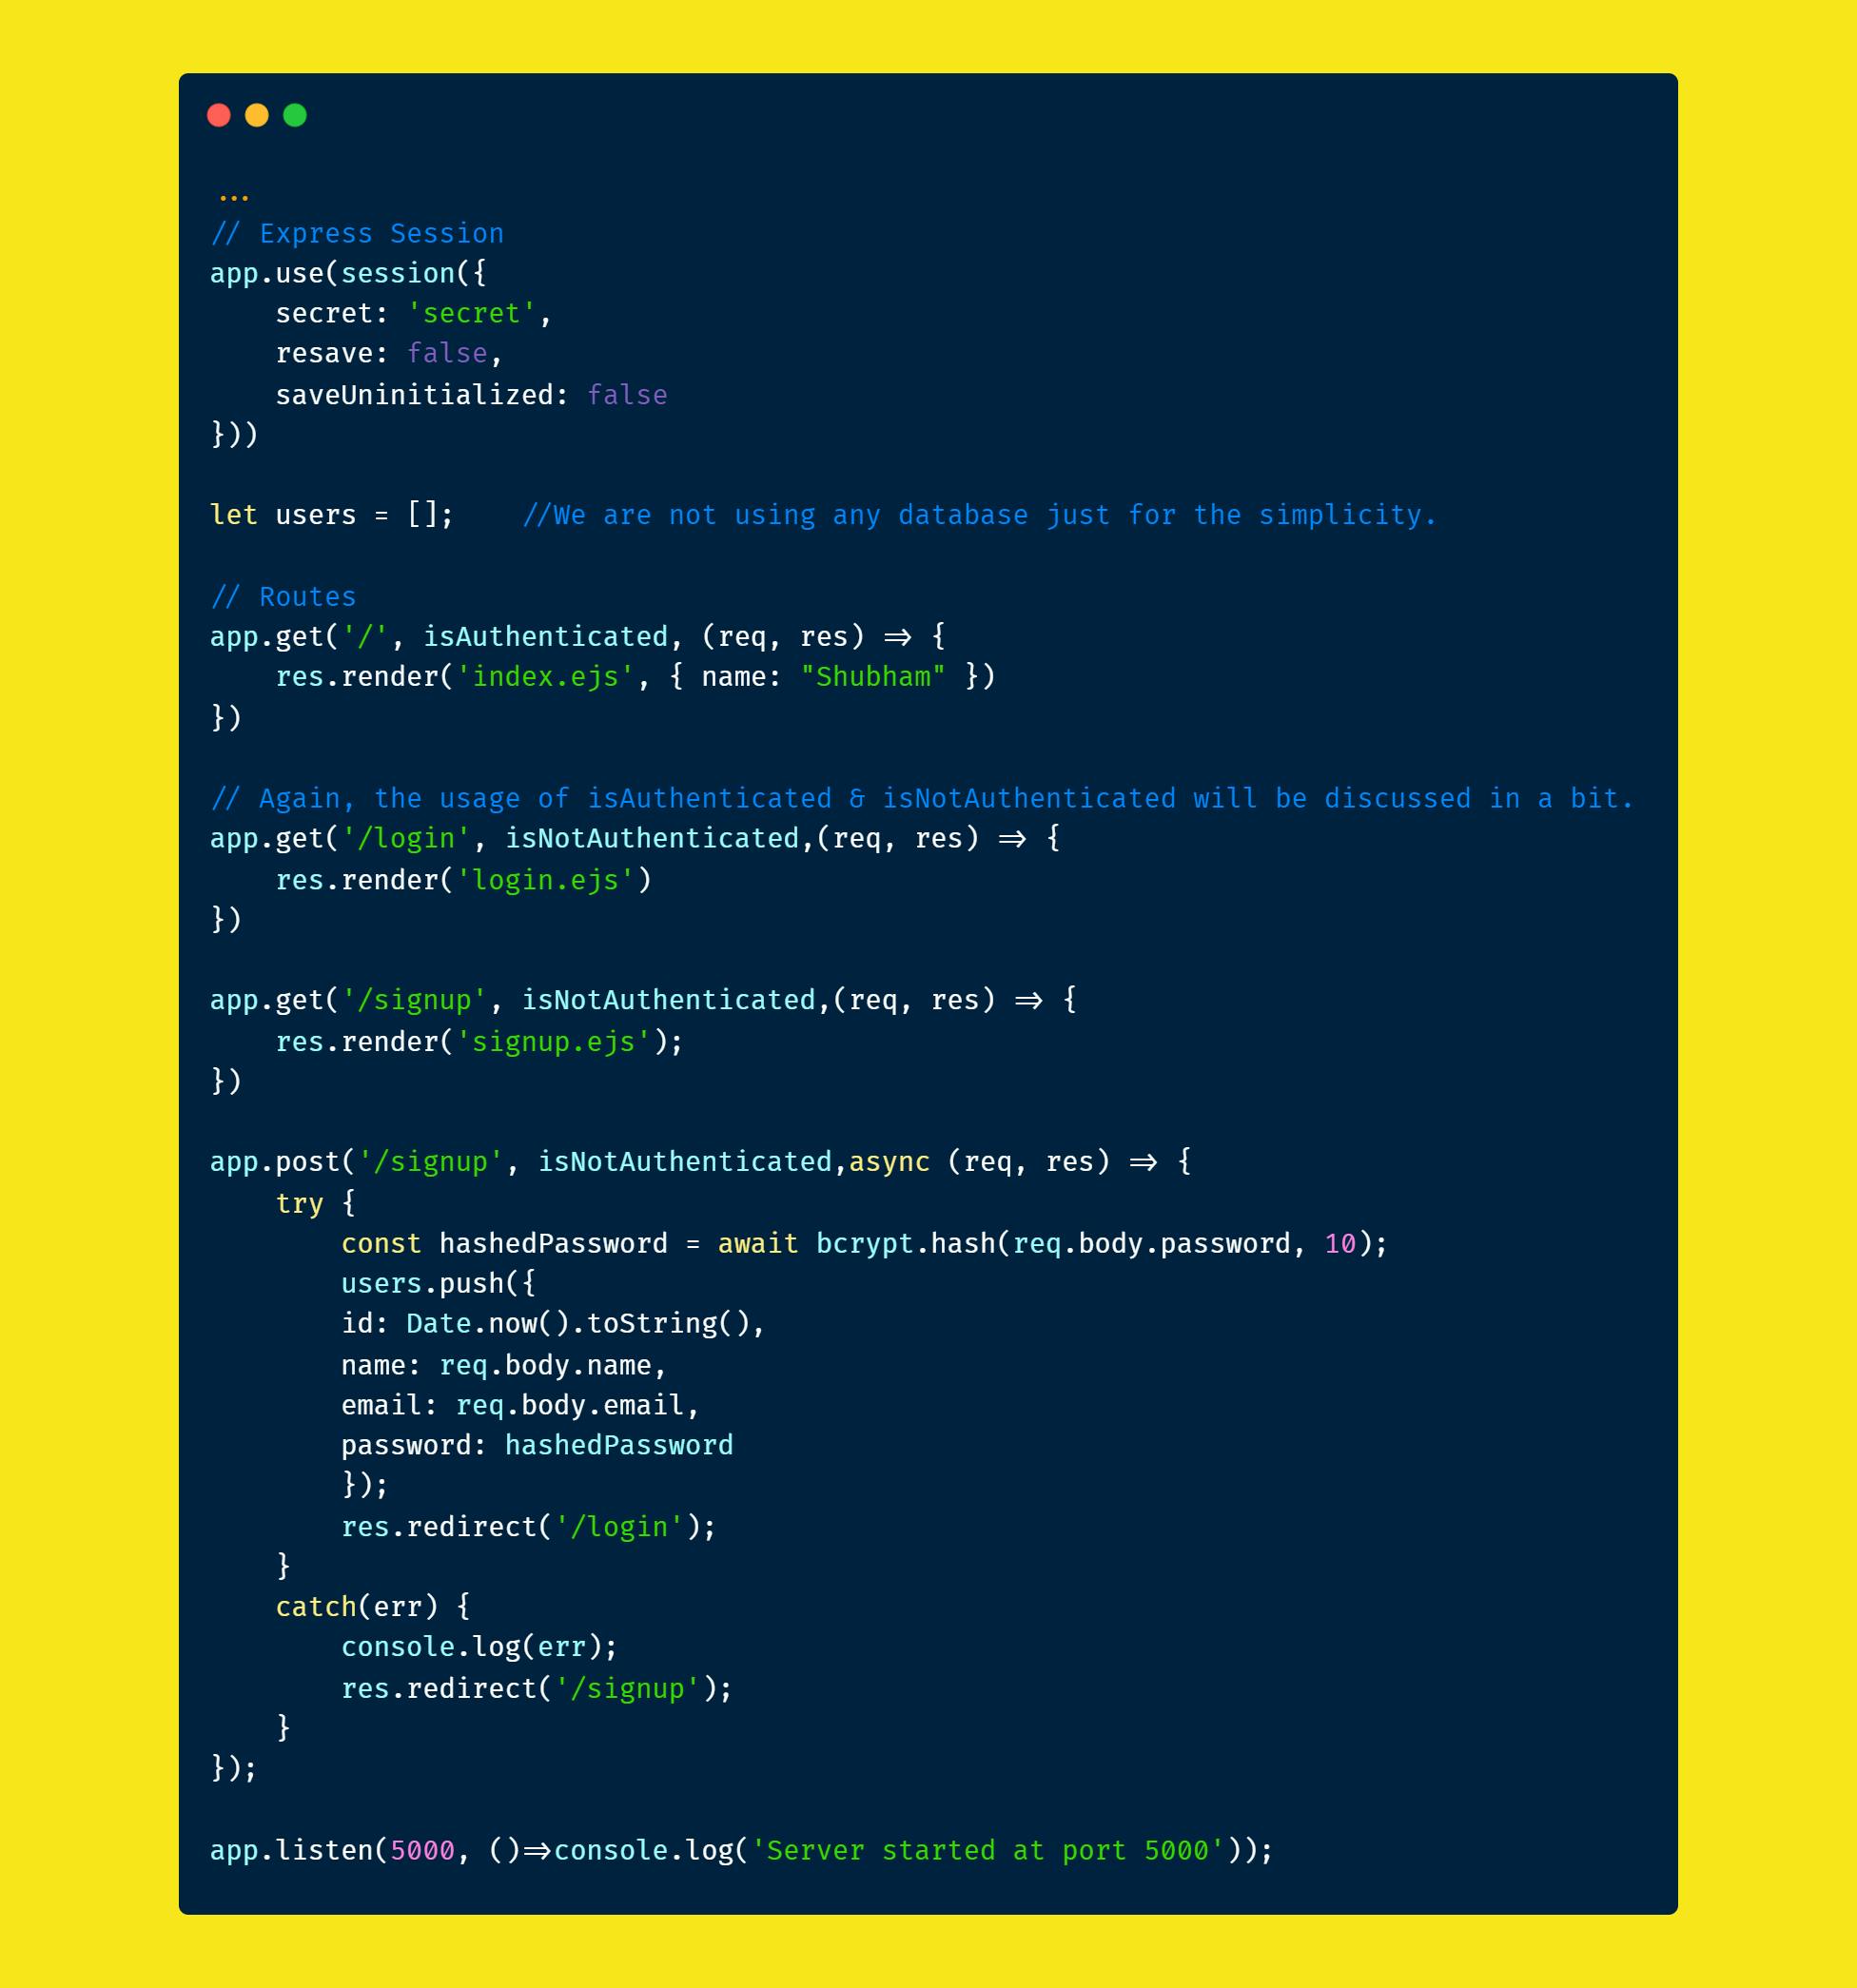
Until now, users can only register, and now comes the passport.js part where users will be authenticated.
Step 3: First, we need to configure the passport in a separate file named passport-config.js to configure the strategy that we will be using, and along with that, we need to initialize it in our app.js file as well.
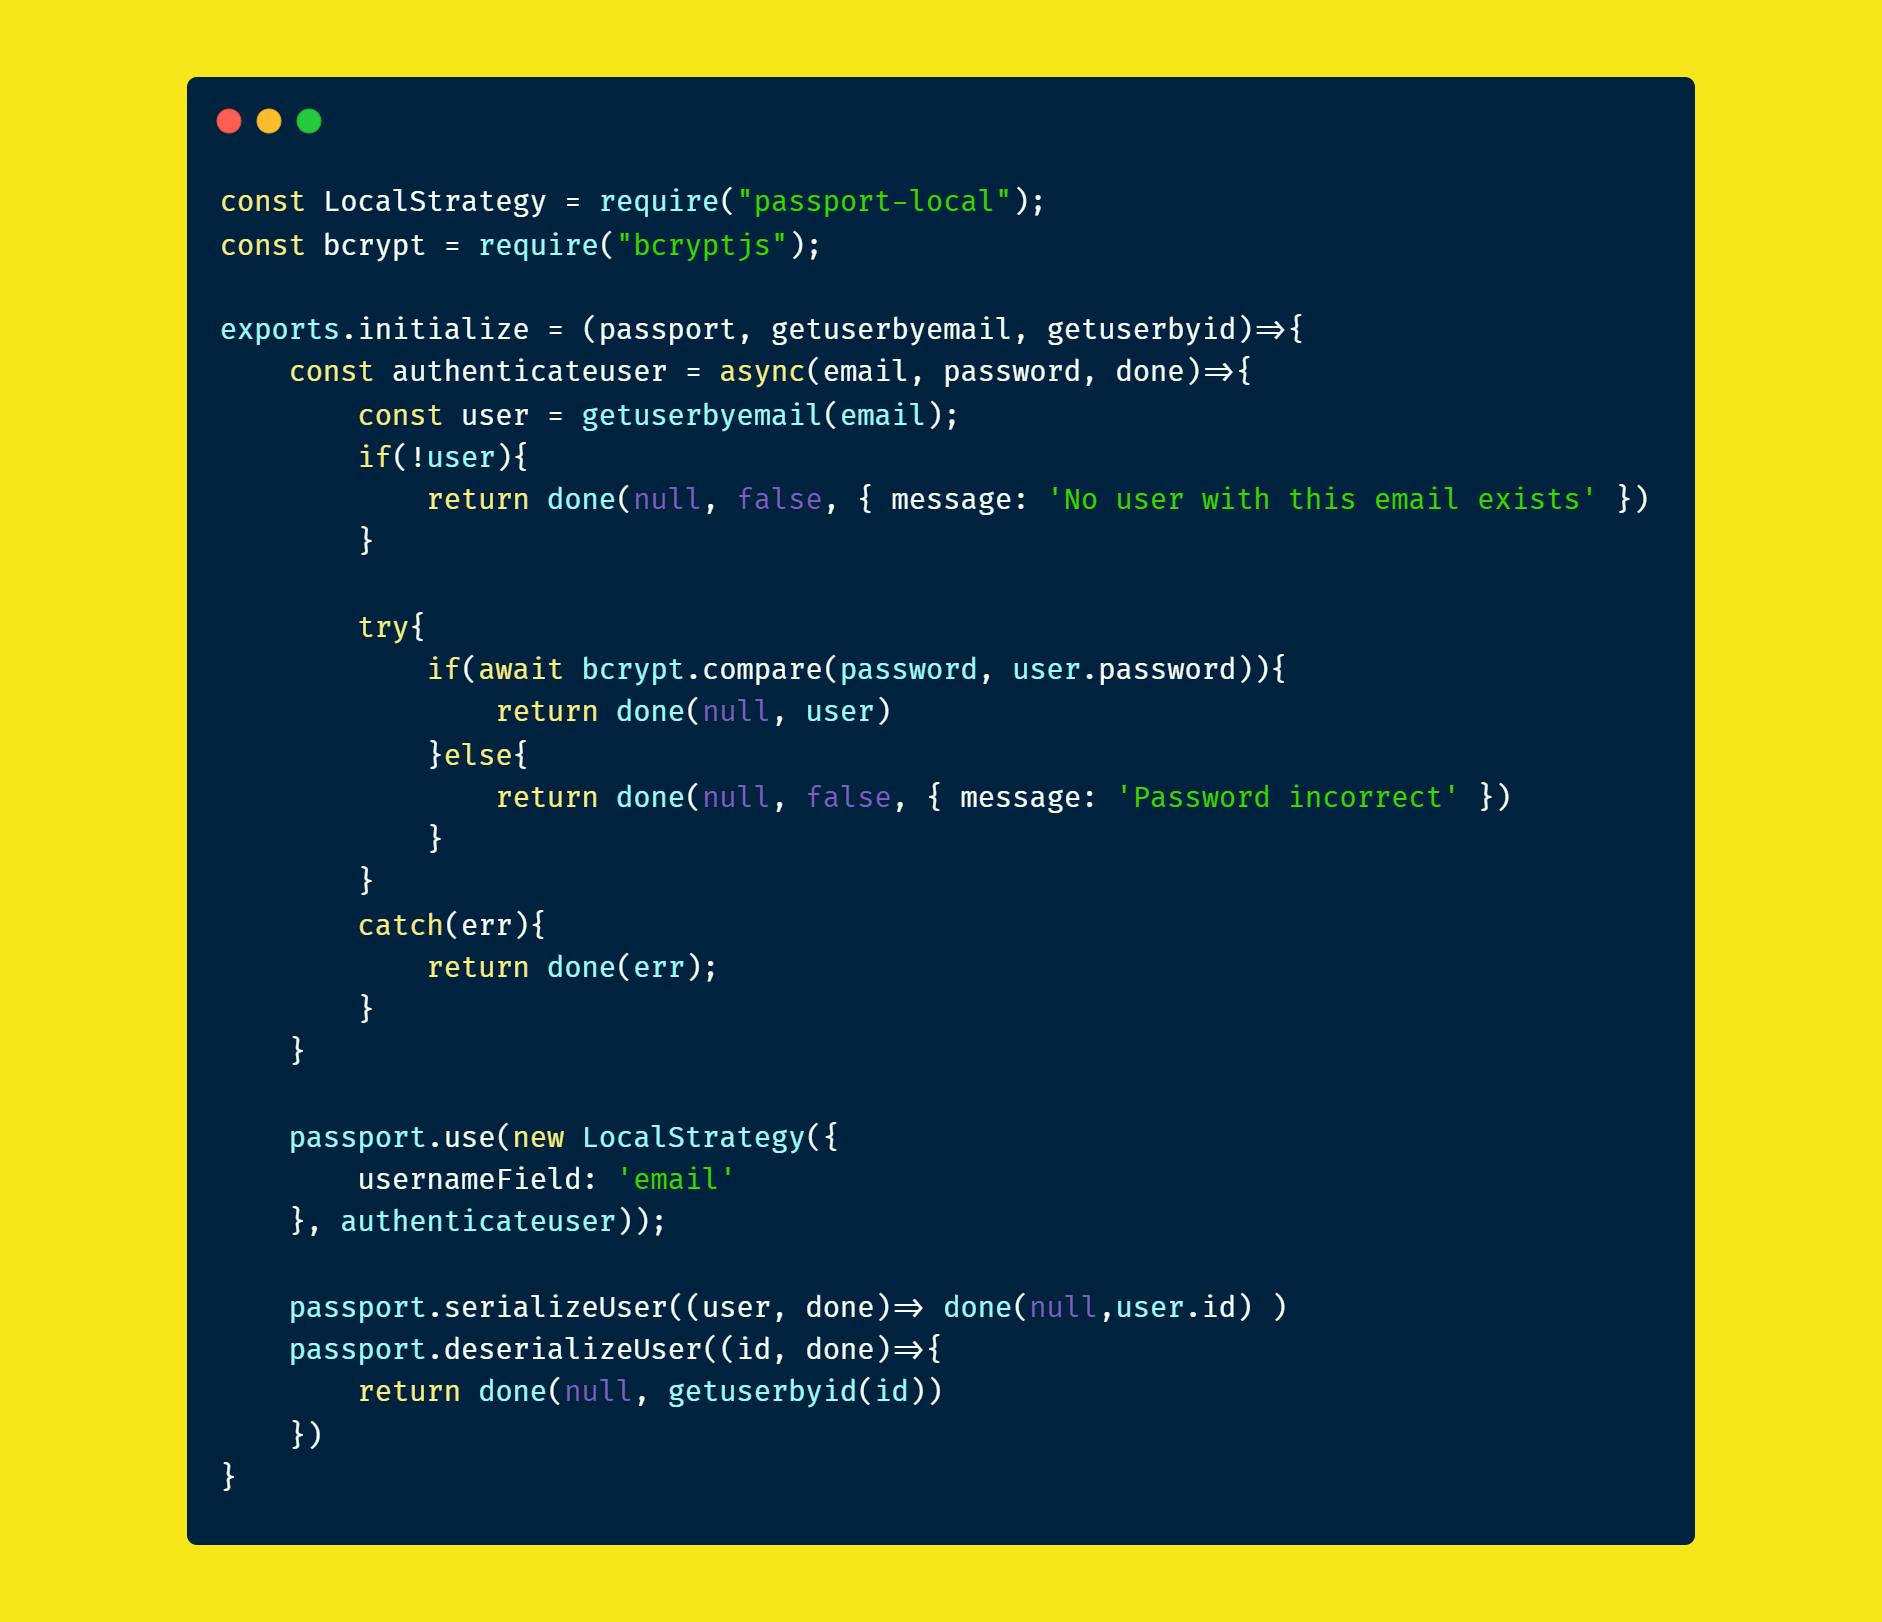
Here, done() known as the verify callback provided by passport and the purpose of a verify callback is to find the user that possesses a set of credentials. [By Passport Documentation]
Now, we have to initialize the passport in app.js.

Note: Make sure that the last two lines of code must come after the express session initialization.
Step 4: Add the subsequent routes along with the helpers that are going to check if the user is Authenticated or NotAuthenticated. Relax, I will share the code repo at the end.
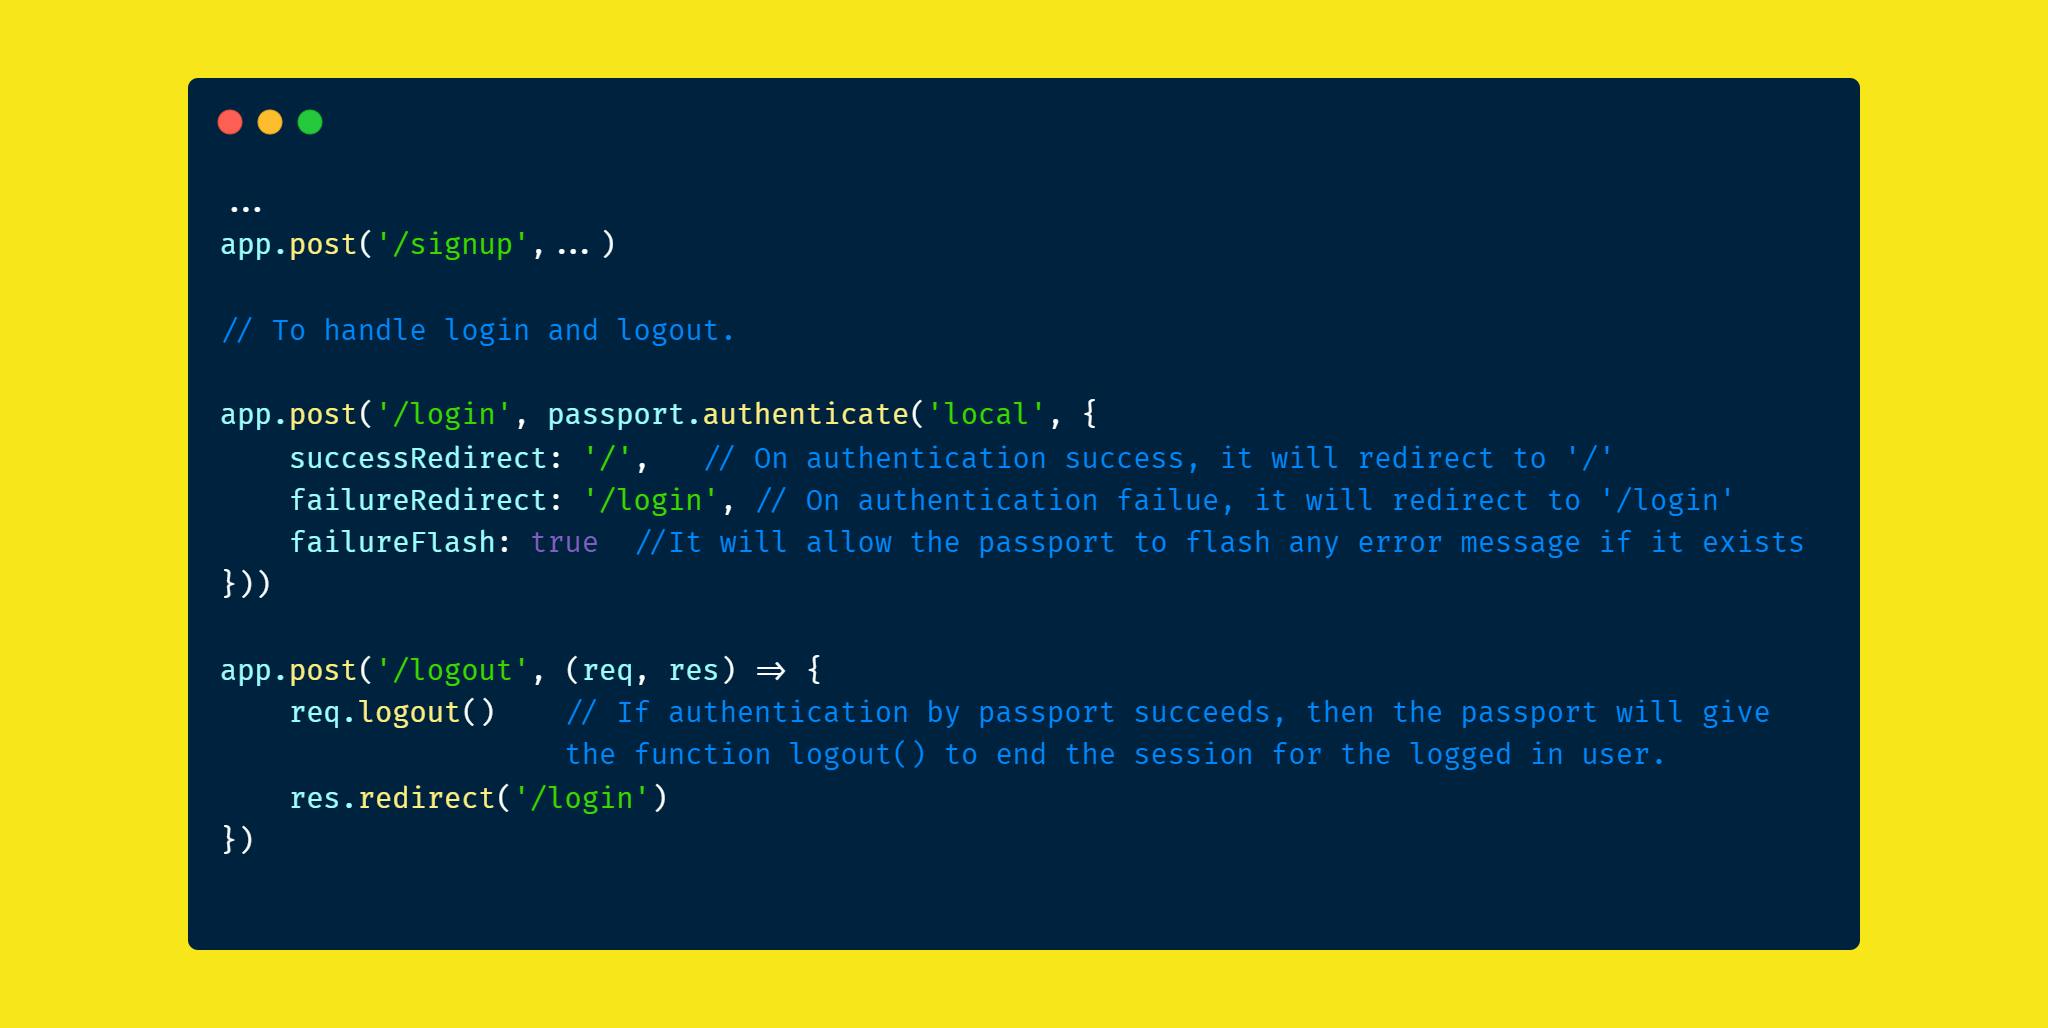 Based on these helpers, the web app will decide whether the user is logged in or not.
Bingo!! Your authentication project is ready with your passport.js
Thanks a lot to bear this short story with me. I hope it helped you a bit. 😎✔